Thursday, July 30, 2009

Vinyl Lettering


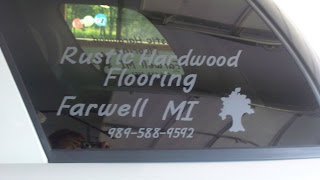
I put lettering for my husband's business on our Trail Blazer. I used the Printing 101 and Stretch Your Imagination cartridges.

Tuesday, July 28, 2009

Little Red Riding Hood-My Community Cartridge


Vinyl on Lampshades


I got the idea to do this from the Capadia Designs blog. I recommend visiting her site and seeing her lamps. She gives a step by step instruction that was very helpful.
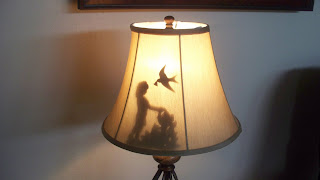
I tried it with lamps in our house. I did not make the design go all the way around the shade because my shades are divided into panels. I also tried using white vinyl, but my shades are very thick and the designs didn't show up very well. So, I used black and when the light is off they have a very light shadow. I want to make sure they stay on the shades so I am going to wait before I decorate any more shades. I really like cutting the vinyl and decorating things. A Child's Year cartridge is perfect for this, but I think there are designs on all the cartridges that will look nice in vinyl.

Just a note on buying vinyl--I ordered vinyl from ebay. It was a bulk order and I could pick 10 colors. It was cheaper than ordering the cricut vinyl, but it is thinner and isn't quite as nice as the cricut vinyl. I will use the cheaper vinyl for the classroom, but for decorating in my own house I prefer the look of the cricut vinyl. The windows that I did and all the lampshade designs were cut out of one package of the cricut vinyl. If you use design studio to plan your designs, you can get a lot of designs out of one piece of vinyl.

Monday, July 27, 2009

A Child's Year-Cutting Vinyl


I tried cutting the vinyl today. I used the Child's year cartridge and cut vinyl for the door windows. This isn't the best picture because of the car and garage door, but you can get an idea. It was a good place to practice. I also put vinyl on the patio door. I used the palm tree border from Life's a Beach to match the palm tree curtains. The first pieces I put on have some bubbles in the vinyl, but I got better at applying it as I made more. I will definitely be cutting more vinyl and decorating more things around the house and in my classroom. I also really like the cartridge. It is one of my favorites!

Sunday, July 26, 2009

My Community Cartridge-3 Pigs


The 3 Little Pigs are done. I made the characters and setting pieces at 8". I cut the pieces on chipboard using the blackout feature and then cut the rest on cardstock and used the cricut pens to draw the details. Then, I glued them on the chipboard and I will glue them to paint sticks when I get some. These should be great for storytelling. They are very sturdy.

Saturday, July 25, 2009

The 3 Pigs-My Community Cartridge


My Community cartridge has a lot of possibilities for school. It has story characters and setting pieces for storytelling. It has parts for: The Little Old Lady who Lives in a Shoe, The 3 Little Pigs, The Gingerbread Man, Little Red Riding Hood, The 3 Bears, Jack and the Beanstalk, Little Red Hen, and pieces that can be used to tell other stories. Besides the story characters and setting pieces, there are community members, vehicles and graphics that can used to make signs for the classroom. This is definitely a cartridge to get if you are a teacher. I'm sure I will get lots of use from this cartridge. Look for this cartridge on ebay. I bought mine for $25.00. (It is $89 at Michaels and other stores.)
Making the 3 Pigs
1. Cut pigs from chipboard (.22 this is for durability). Use the blackout feature, deep cut blade, multi-cut (2), speed 2, pressure 5. I cut mine at 6 1/2". I tried 7", but the clothes can only go as big as 6 1/2 on a 12 X 12 piece of paper.
2. Cut pigs from flesh colored cardstock. Regular blade, speed 5, pressure 5. I did not use the blackout feature because I wanted the face to be outlined, but if you are going to stamp or draw the face you could use the blackout feature.
3. Glue the cardstock on the chipboard.
4. Make the clothes. Press layers and the pig key. I cut the clothes out of 5 different pieces of cardstock so I could mix and match clothing.
5. Put stitching marks on the clothes.
6. Glue clothes to the pig.
7. Glue on eyes and add any embellishments.

Next project: the wolf and houses

Thursday, July 23, 2009

Where have I been?

I have been working with the cricut in between family life and responsibilities. We have had appointments for things I like to take care of during the summer and have gotten together with friends and family for some summer fun. So, here goes...
I have been making things, but have not taken the time to blog about it. I have cut foam, chipboard, material, felt, paper, pretty much everything but vinyl. That will be my next venture. I have also discovered e-bay. If you are looking to buy a cricut, accessories or cartridges, you will want to check out e-bay. I have bought many cartridges and most for between $30-40. I will post separate about e-bay later.
I am going to post each project separately so I can tag them individually.

New Projects

Click to play this Smilebox slideshow: New Projects
Create your own slideshow - Powered by Smilebox
Make a Smilebox slideshow

Cards for Personal Use


I have found that I enjoy making cards. I have learned to use the Cricut by making cards and enjoy coming up with new ideas. I get ideas from bloggers and you tube. I have found the videos by the pink stamper to be the most helpful. I watch her videos and make a card similar to hers (the cherry card is one she did a video on) or often times it gives me an idea from one of my own cards. I appreciate all the time she has taken to make these videos. I have learned a lot from her. Be sure to check out The Pink Stamper videos on You Tube.

Thanksgiving Card


We always make cards to give parents and family members on each holiday. Usually, I have the kids trace their hands and make a hand turkey and then write on the inside of the card. We will still make those and will make these. I cut the parts for these cards on the cricut and the kids will assemble them, color the turkey and write on the inside. I have all the pieces cut for 30 students. The parts of the card: happy thanksgiving words, grass for 2 layers ( I used pop ups for a 3D grass effect), folded cards, and the turkey. The turkey is from the animal kingdom cartridge. I used the markers to have the Cricut draw the turkey and the I used the cut feature to cut the turkeys out. The turkeys were cut on manilla paper and the students will use colored pencils to finish them.
As always, when I have an art project I tie the project to our learning objectives. This projects reinforces patterns (the kids will be asked to color the feathers in an AB or ABC pattern. It is a quick way to assess their ability to make a pattern. The most important learning part of the card is the writing on the inside and on the envelope. The inside of the card is blank so we can work on letter writing skills, directionality for writing on cards, letter formation and it is a way to assess their writing ability. I can see if they are writing known words, using beginning, middle or end sounds to write words and use of punctuation.

Chipboard or Word Books using the Zutter Bind-It-All


One of the blogs I first discovered for cricut was the Pink Stamper Blog. She has a lot of stuff on her blog and I highly recommend checking it out. She also makes videos that are on You tube and her blog. Her videos are awesome and very helpful. In one of the videos I watched, she made a word book and used the Zutter Bind-It-All to put it together. I loved the chipboard book idea and HAD to have the BIA. So, naturally, I went to e-bay and bid on one. I couldn't wait to use it and these are the first books I made. You could use a regular binding machine or stapler if you prefer.
Again, I have so many ideas for these books for school and for gifts for people. I love making these. I recommend watching her video and following her step by step instructions. There are lots of ideas and samples of these on the internet. Search for word books and you will find lots of links. I searched and found another blog that is awesome. The blog is Just a Scrappin. She has a Halloween book on her site and other books. She puts the cut files on her site so you can download them and use them. I think it is great that all these people use their time to put this stuff on the web for people to use. I really appreciate their hardwork. I haven't made the Boo book yet, but I downloaded and plan to make them for the kids to use for their October writing. On the side of her blog she has a list and on the list is "cut files" these are the files you can download and will work with the Cricut Design Studio. She also had a spider book that I downloaded and have made a class set of. I haven't taken a picture, but I made enough for 30 (yep, 30 give or take a couple) students to put together a book. I will have them bound together and they will use them for their spider information books that we will make in October.

Tags. bags. boxes and more


This is a fun cartridge. There is so much you can make and I have a lot of ideas for school use. On this day, I just played around and got to know the cartridge. This is a cartridge that I would have to use and put the bags together. The kids would not be able to put the bags together, but the bags are quick to make and add a nice touch. Some of the ideas I have for this cartridge:
*treat bags or boxes,
*flash cards and holder
*cute holder for teeth that fall out. (the girls would love to put their teeth in the purse)
*name tags
*tags for lockers
*gift bags to wrap presents we make.
*welcome to school goody bag

And I am sure I will find more uses. This is one of my favorite cartridges.

Paper Dolls


I wanted this cartridge so I could make stick puppets for storytelling. I made the prince and the princess first out of chipboard and cardstock. I had to make them using cricut design studio so I could get the most use out of my chipboard and have them as big as possible. They are 9".
These are the steps for making them:
1. Cut the body out of chipboard. ( I ordered chipboard from e-bay the thickness is .22. I used the deep cut blade and the multi-cut feature.)
2. Cut the body out of flesh colored card stock. ( I found some very heavy flesh cardstock at Michaels.)
3. Glue the 2 bodies together. This makes the people very sturdy. (This is important when you teach kindergarten!)
4. I made the clothes following the steps in the paperdoll book and glued them on the bodies.
5. I stamped the face on with a stamp that I bought from Peachy Keen stamps.
6. I added embellishments.
7. I haven't done this yet, but I get paint stir sticks from Lowes or Home Depot every year and I will glue them on the back so the dolls will become puppets.

2nd Doll I made
I wanted to see if making the puppets out of fabric would make them sturdier. (Again, thinking of the 5 year olds who will be using them :) ) So, I made one out of fabric. The fabric is just a cotton blend that I bought on sale at Jo-Anns. I also used felt for the hair. The felt and the cotton get prepared that same way. I ironed some wonder under on the back to make the fabric stable so it wouldn't stretch when it was cut on the cricut. Wonder under (or craft fusing) is an iron on interfacing that has a paper backing on both sides. One side gets ironed to the fabric and you cut the fabric with the paper backing on the other side left on. After you cut the fabric into the shape you want, you peel the backing off and iron it onto the doll or whatever you want to adhere it to.
Steps for fabric puppet:
1. Prepare fabric. Iron on interfacing to the fabric you are going to use. Leave the paper backing on the other side.
2. Cut body out of chipboard. (.22 thickness, and at 9")
3. Cut body out of prepared flesh colored material.
4. Peel off the paper backing and iron the material to the chipboard. I used some glue too.
5. Cut the clothes and hair out of the prepared fabric. (I cut his boots out of a heavy piece of vinyl that I got in the clearance bin at Jo-Anns. The vinyl is not sticky on the back so I had to glue it on. The vinyl does not need wonder under and it cuts beautifully. I may use more vinyl for clothes in the future because it cuts so well and it can be wiped off with easier. I cut the hair out of felt for the texture. The vinyl and the felt were cut with the deep cut blade and the felt had to be cut multiple times (at least 2).
6. Peel backing off and iron the clothes and hair on to the doll.
7. Stamp the face. I used the same face stamp that I bought from Peachy Keen stamps and it stamped just as easily on the fabric.
8. Add Embellishments.

So, is the fabric puppet more sturdy? Time will tell through use, but I think it will be. I think the vinyl will hold up the best because it cuts better, doesn't need wonder under, is heavier and wipes clean. The drawback with the vinyl is the cost and limited colors. (Note: This is upholstery vinyl, not the cricut vinyl that has a sticky back). I am going to pick it up when I can find it in the clearance bin and make as many of the pieces as I can with it. (shoes, pants, cape, etc...). It cuts better, doesn't need wonder under, is heavier and wipes clean. However, paper is quicker, cheaper and there is a greater variety of colors and patterns.